
How to Screen Print on Clay
Here I show you how to screen print on clay. I have only really done this a handful of times so as I get better I will add more tips and images to this post. I have only done this once before, 15 years ago during my degree.
The basics of what you will need:
1. Pattern printed on card
2. Craft knife
3. Silk Screen
4. Squeegie to spread colour (I used a window squeegie)
5. Clay
6. Tape
Making the Cardboard Template
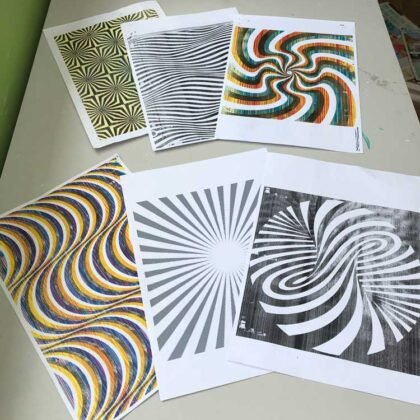
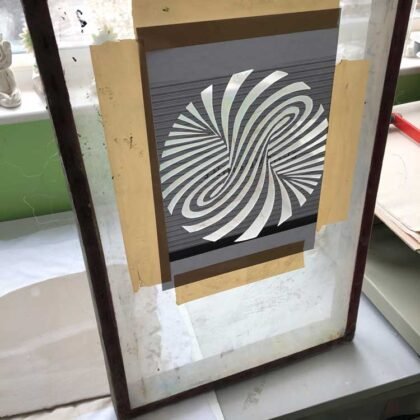
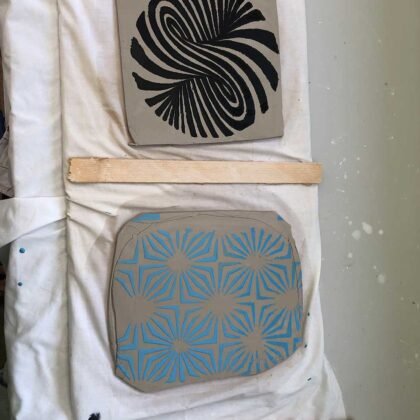
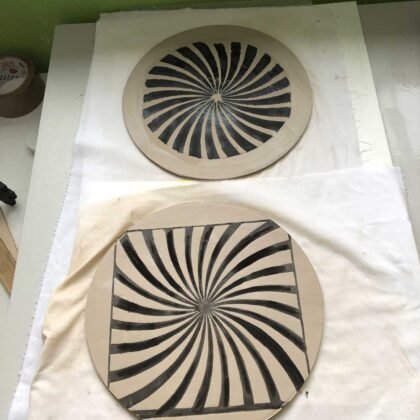
Print an image on an A4 sheet of card or you can go larger over 2 or 4 sheets. Of course you could go to a printers and get a larger print. The simpler the pattern the easier it will be. I love a challenge and optical illusion patterns so these are some of the patterns I have been playing around with:
You could use printer paper and then spray it with a few layers of acrylic. I did this with the first few I tired and the acrylic gave the paper about 3 prints each. Card is definitely better, but I am looking for some good plastic to use going forward.
Put the card on something that you don’t mind getting scratched. I used a plastic table dinner place-mat here. I have since bought a proper cutting mat from Hobby Craft. I used a ruler on this pattern:

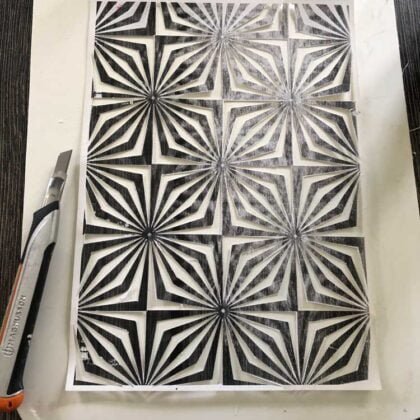
Once done you can turn it over and tidy up any bits. Practice is needed. I ended up getting a new blade and slowing right down after this one:
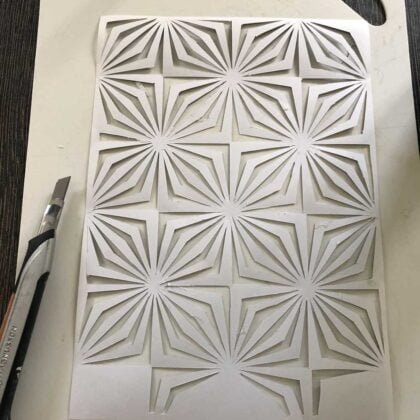

Once you have a template your happy with, it’s time to set up the screen. I made a few, each template got better with practice and patience.
Roll out the clay
You will need some slabs of clay to work with. I used two bats and a roller to roll this clay. I have since bought a mini slab roller which is making my life a lot easier. Plastic table dinner place-mats come in handy here for moving slabs of clay around.

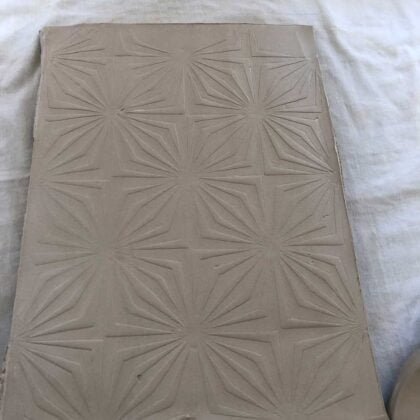
You could use the template to transfer the pattern onto the clay for hand printing like below:
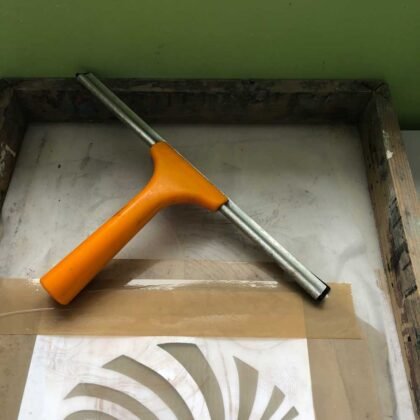
Set up Silk Screen
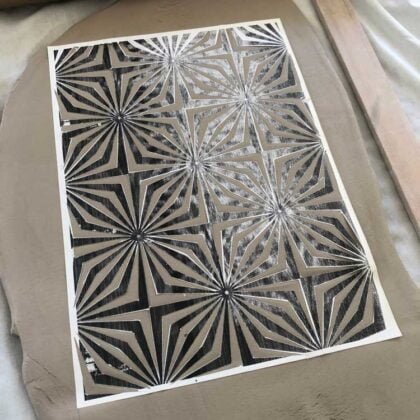
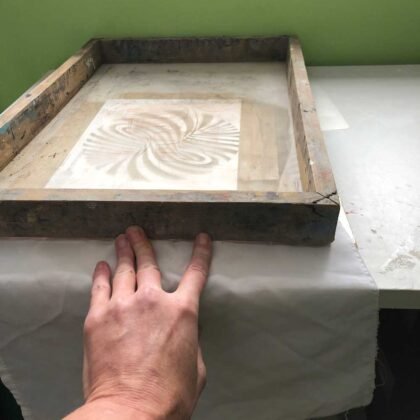
Fix the template to the back of the screen. I use brown tape and it works fine. But you could use sellotape.
Line up the board over the clay, using bats so the template doesn’t quite touch the clay. See image below and how I used wooden bats slightly thicker than rolled clay.
IMPORTANT TIP
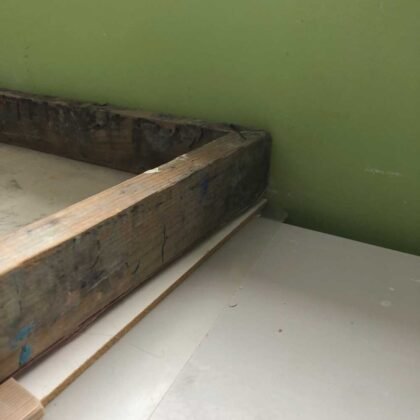
If you are using an old silk screen like the one below, you don’t want it to move when printing so make sure its pushed up against a wall.
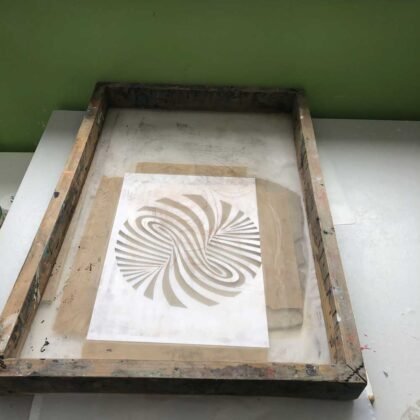
I put some tape at the top of the pattern and below it for the printing colour. I also taped around the sides. Remember the paint will fall through, so if you want to just paint the pattern and only the pattern you have to cover all the areas you don’t want the colour to go.

If you haven’t got a proper squeegee a window squeegee works. (I will be getting a proper one!).
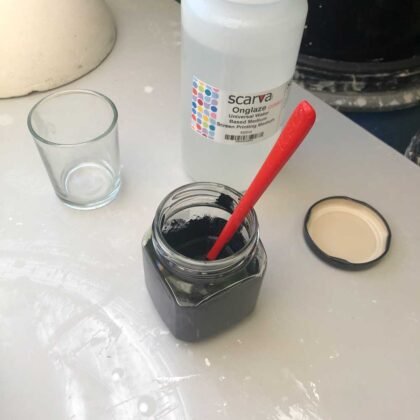
Get your printing colour ready
I am testing this screen printing medium which I bought from Scarva. I added black iron oxide and made a smooth paste. There are lots of different mediums today which I plan to experiment with.
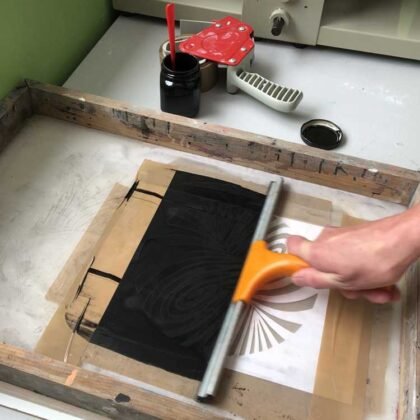
Screen Print on Rolled Clay
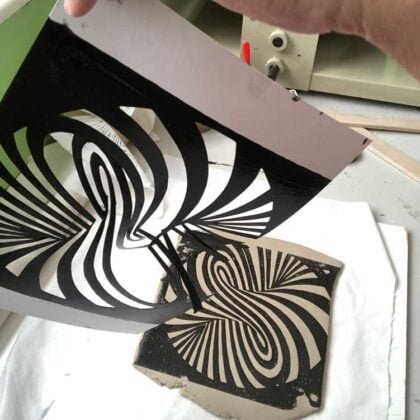
Put the coloured screen printing medium right across the top of the brown tape.

Using one hand push and hold the printing screen flush up to the wall and with one stroke if you can, drag the squeegee from the top to the bottom taped part. Hopefully it should cover the whole pattern, if it doesn’t you could try going back over one more time.
You can scrape and reclaim any unused colour from the bottom taped area where the colour should be now.
Not bad, bit of a blur..
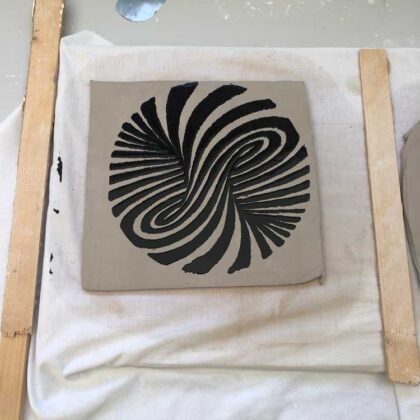
Lift the screen print off the clay and remove the template. I like to use this as a print straight away on another prepared bit of rolled clay like below:
Here I touched up where there was some parts missing on one print:

Voila! That is how to screen print on clay. Let the colour dry before cutting and moving the clay. You can then do whatever you wish.
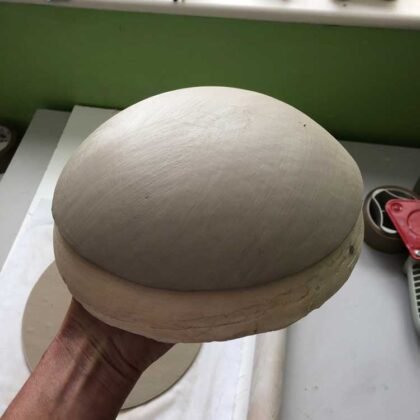
Here I used a hump mold. You can learn ‘How to make plaster press hump molds’ here.
This is where I used the template wet on another bit of clay by hand. I just placed over the clay, put a sheet material over it, rolled over gently with the rolling pin. I actually prefer the affect of the second print. I may experiment just screen printing the template (or painting on with brush) and then manually pressing that template onto the clay. The options are endless with ceramics which is why I love it so much.
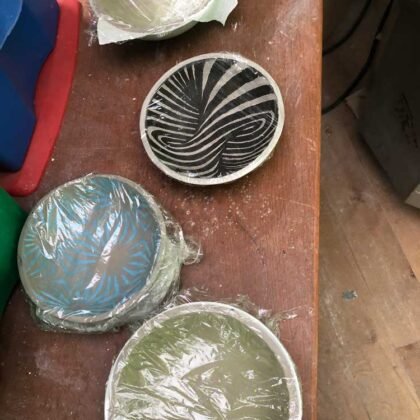
Screen Printed Bowls Drying
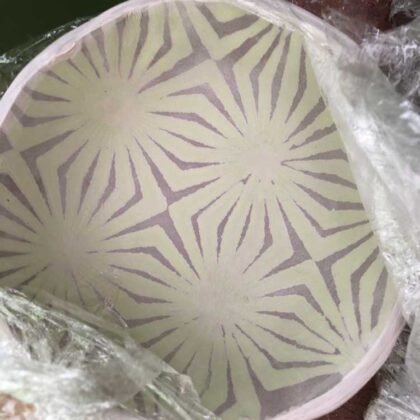
This one was so messy after the black print, i turned the screen round and printed the green over the top of the gaps! Its a bit messy and crazy but was fun!
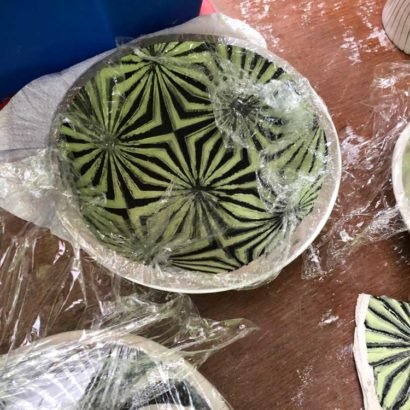
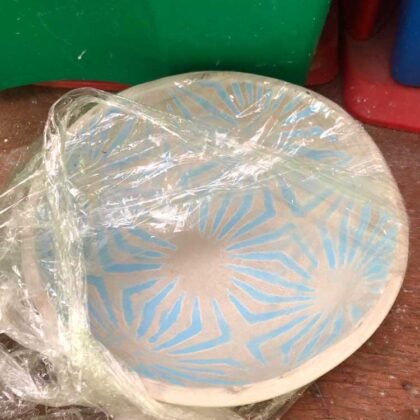
As you can see by the tiny cracks on the black bowl I think it dried too quick. I have since made others which are better. I will update this post when some of these are fired.
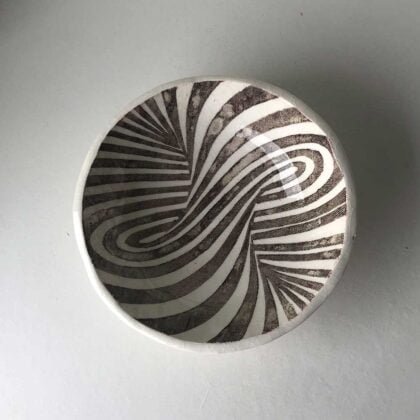
Some of the prints blurred a bit. I am learning whether this is to do with the medium being to runny, the medium full stop, or my templates. The more I practice the more I will master the skill. But I am happy with the results so far. It has been over 15 years since I was taught the process, and that module only ran for one semester. But I remember enjoying it and its been in the back of my mind for a long time now. I did want to do this at my workshop down Coalport this year.. It was part of my plan. But as that’s on hold, I will carry on messing up my house experimenting with clay.
As I learn more tricks and tips I will share. If any of you who are more experienced in ceramic screen printing wish to share their tips below, I would be very grateful.
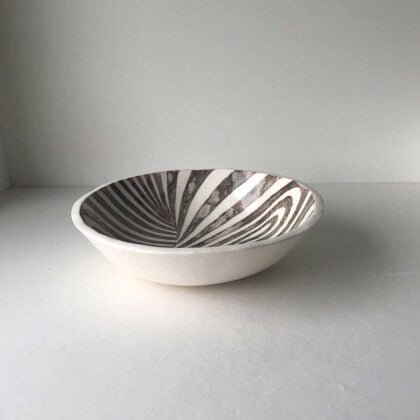
Finished Glazed Bowls
This is one of the finished bowls. I forgot to take pictures of all the bowls I made, the colourful ones were soon snapped up by friends. Some had tiny cracks where they dried too quick so I didn’t want to sell them. Sorry to those who follow me on Facebook as many were a few people looking forward to buying them. But they were a trial to see if I could screen print again which I think with a bit more practice I could create some nice ranges of bowls. As I update this post today on the 2nd September, I am in the process of building a workshop in my garden. I have outgrown my current workspace and sick of the mess in my house. So my artwork is on hold while I build this workshop. Once complete I will develop these and add feet lips or rims to the base and have some available to buy. Roll on 2021, this year can do one! I was supposed to be in my workshop at Coalport China Museum this year. After working from home for 11 years I was looking forward to moving into the museum. But now I am excited about my new workshop where I will have the space to run classes and teach people how to screen print on clay and make bowls like these:

 Previous Post